Author Archives: Campfire Kev

Flamin' Great! Surviving the Original Mountain Marathon…

By Regular Guest Writer, Richard Dunne…

"At the ill fated OMM (Original Mountain Marathon) in the Lakes last October, many people needed rescuing and others stayed in the fells overnight. The deep low pressure that hit was some sort of freak weather event.

The rain was sideways and frozen like sand in your face, the gusts of wind were lifting people off their feet and the flood waters that swelled so quickly were sweeping huge rocks and cars away. It really did turn the 2 day event into a nightmare and it was cancelled half way through day 1 as the storm raged. This video shows what it was really like that day:

However me and my buddy were properly equipped and well prepared and actually enjoyed the challenge of getting back to the starting point safely and unassisted. We had reached the day 1 finishing point on time, unaware of the cancelled status of the event and it was just a case of get yourself back.

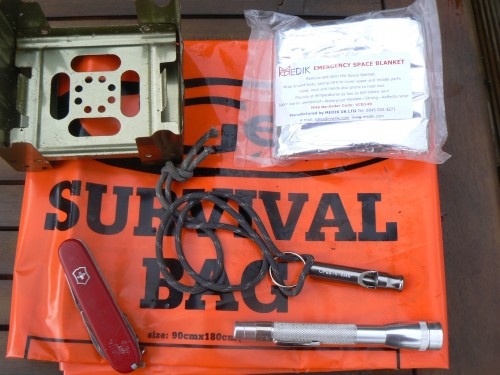
mountainsurvivalkit

While other people stood around, wrapped up in emergency space blankets peering from the safety of farm sheds, we stepped out into the storm with many others and walked back, following the road which was mainly underwater at the time, with regular brew stops and energy bars to keep us going. If we had to, we could have stayed out through the night but it wasn’t necessary.

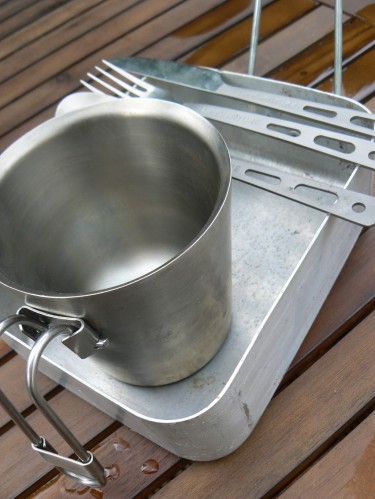
messkit

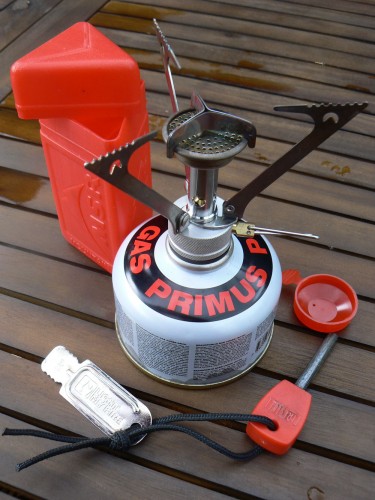
A Fast Boiler When You Need It – MSR Pocket Rocket

msrpocketrocket

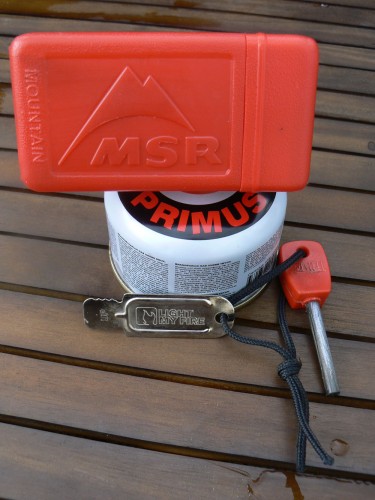
One thing that really helped us that day was my great ‘MSR pocket rocket’. A simple item in your kit that is easy to use, folds up and boils up water really quickly. A real morale booster – when things are too extreme or serious for other methods. The flame is intense, adjustable and won’t blow out. This is a great back up item to have without overloading yourself. We used it too in the Brecon Beacons in January on a 12 mile walk. There’s nothing like a hot drink in -10 winds. For canoeing and wild camping, it’s perfect too. Fast and efficient if you’re in the mood for a no fuss warming up. Recommended. It was about £30 and the gas canisters are a few quid. My one doesn’t have an ignition but that’s where my striker comes in. Flaming Great, and just what you need when things go bad like they did that day.

msrpocketrocket2

See http://www.penrithsurvival.com/ for details.

Canada’s Swag – the Duluth Bedroll…

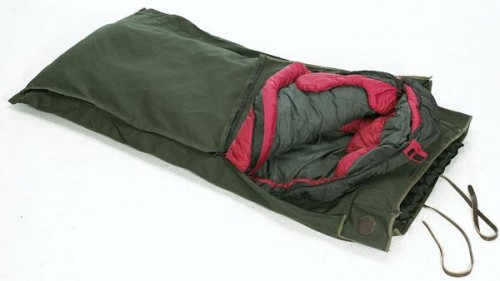
This looks very similar to the Australian swag bags I've used for canoe-camping: the Duluth Bedroll from Duluth Pack Company in the States, famous for making the classic Duluth packs used in open Canadian canoeing. At $220 it's not cheap but looks like an excellent, sturdy piece of gear that would do the job as well as any swag.

duluthbedroll
See their website While you're there take a look at some of the other specialised gear they sell, and also read the fascinating history pages, tracing the evolution of the Duluth pack and the Company.

[Update: Our new Wynnchester Australian Swag Bedrolls are available online from www.wynnchester.co.uk – see latest post.

Heading For The River…

In 12 hours time we will be making camp for the first night of a 3 day river trip – It’s June so the weather should be good, but look at the night-time temperature prediction below: based on windchill etc., look at the “feels like” column! Looks like the first night could be a cold one…

photo.jpg

Good 'Ol Kelly…

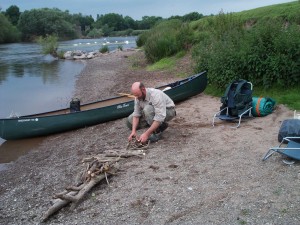
Just thought I’d collect my thoughts following a recent canoeing and ‘get out and stay out’ camping trip in the Wye valley. I’ve shared a few tips and ‘learns’ below that I’ve picked up in recent trips with the help of a touch of ‘backyard’ testing too. 

Camp Fire!  Firstly, respect your surroundings at all times, only light camp fires where and when they are allowed and keep it safe. Depending on where you are and if there are restrictions – find out and follow the rules.  Extinguish remains and embers thoroughly as it can travel both over and under the ground.     

  • Collect the fluffy bits from your tumble dryer – from the filter you have to keep clear. Great tinder support. Keep it dry and take it as back up as you can find tinder in the field / woods, even in the rain if you know where to look. Ray can anyway.!
     
  • Open pine cones great too, put a couple in with your small twigs.  The air gets in around them and it really picks up quickly
  • Prepare your sizes of sticks before hand and have them in different graded size piles.  Nothing too fussy but otherwise you will be scrabbling around for the right sizes…. and the fire has gone out.
     
  • Birch tree – tiny delicate bark shavings are fab too – they are flakey – care not to damage any trees though.  We’re talking the tiny bits from broken branches if possible.
     
  • Have a lighter and/or matches as back up but try to light your camp fire with a simple steel striker without an instant naked flame doing the work for you. I know this maybe cheating too but it’s only a step away from a flint stone approach, so stop making it so easy and improve your skills.
     
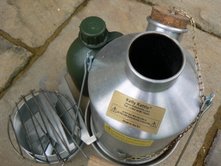
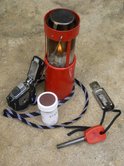
  • I find that firing up Kelly Kettle and using what’s left is easier than starting from scratch with a general camp fire. Let the chimney effect of the Kelly process do its thing.  Remember to point the ‘vent’ hole into the approaching wind to feed Kelly with air.  If there’s no wind, blow in there but too much puff and its out. Once your water is boiling use the established fire base to start your camp fire and have the sticks ready.  It’s all in the prep.

    rich1 

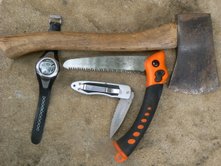
  • A well as a small sharp knife, if you don’t mind carrying it – a little wooden handled hand axe is very useful or even a hand sized fold up saw – most DIY stores.

    rich2 

  • On two occasions recently, I burnt my hand lifting the full kettle from the fire and in my instant reaction to the burn, spilt precious water on the fire that I still needed as I lifted it off! Now I run a decent stick under the kettle handle, angle it and lift from there, to keep my hand away from climbing flames in the ‘chimney’ of the kettle. Also, if you put the kettle straight on to a small fire rather than its own base, remember to keep the cork and wooden part of the handle away from the ‘wider’ flames.
     
  • Update. New Kelly Kettle Video Here.

  • The medium Kelly kettle takes 2.5 pints but remember not to fill it unnecessarily.  How much tea do you need? You’ll be peeing all night. Boil what you need for 2 mugs and it will be quicker anyway.
     
  • Collect fire wood, tinder, dried grass, leaves etc during your walk or canoe trip.  Don’t expect it to be lined up for you where you want to light your fire.  There won’t be a boot sale there with an estate car full of twigs with a bloke going, ‘’50p for the lot – get your fire here.’’  Not in the places I’ve camped anyway. Chances are it will be getting dark and there won’t be a dry stick in 50 metres radius especially if it’s a well used spot.  You might be lucky but don’t walk past some great natural fuel if it’s jumping out at you.  And it will be.  So much of it you might not see it.  Can’t see the wood for the trees and all that.  Take the dead stuff – don’t hack away at branches.  Look under your feet. Chuck it in your bag or into the canoe if you can reach it but don’t rock the boat!  It’s all in the prep.
     
  • Get the right side of the wind.  There’s nothing worse than a face full and eye full of smoke just as you’re getting it going. As your eyes sting and stream with tears, the appeal will wear off and you’ll be longing for a gas cooker and a wet flannel.
     
  • During the effort, refrain from putting your ‘tools’ from your kit on the ground – eg knife, striker, maglite etc.  You’ll mislay it, walk it into the soil, lose it in the cover or generally lose track.  Get in the habit of putting it into one handy pocket with a zip… and zip it up or it’s falling out with all the stooping you’re doing.  It’s like at home doing a bit of DIY – can you ever find your pencil if you put it down?! And the car keys…….

    rich31 

old swag in a bag 

There’s something to be said for not having a tent covering you up and hiding you away from the sky, especially when it’s fine. I guess in a tent, you’re not really out – you’re still ‘in’ and enclosed.  Recently, I lay half under the half turned boat in my sleeping bag with nothing above me apart from a little dew and a million stars.  As my old mate, Kevin, snored and grunted like a badger in his swag bag with only his beard on show, I listened to the Tawny Owls echoing in the valley, the splash of jumping fish in the Wye beside us and I picked out the shooting stars that were occasionally trailing and burning through the sky – sometimes I was momentarily tricked by the constant path and track of a man made one.  The birds were singing at 4.30 and it was impossible to sleep so watching the sunrise in the valley was the next thing and it was going to be a scorcher.  The ‘badger’ was awake too, not long after – and it was coffee, courtesy of good ol’ Kelly! 

travelling light with your buddy 

  • I find a good way to keep things to a minimum, with your buddy doing the same, is to challenge each other.  Basically swap bags and go through each others and get ‘tuff with the stuff’.  Take it out.  Why do you need this? and this? and this? How many of these?! Be honest with each other and eliminate any unnecessary duplication of kit.  Never cut out essentials but know what the essentials are. Could be they’ve forgotten something and you need to add rather than take away but you only know by checking. Oh, when you’ve checked it to an essentials ‘list’, check it again. Make sure you both know where the car keys are, the mobile, the tiny first aid kit you argued about taking earlier……….and zip up pockets and pouches ….or an item could slip out in the long grass when you have your next brew and you’ve lost it for ever……..
Reblog this post [with Zemanta]

the cheap option!!

OK it’s not too authentic looking but under a ‘Budget Bushcraft’ philosophy this looks very interesting! A very simple metal framed ‘Baker Tent’ from….   Argos?! Yes and being from Argos it comes in at an amazing £69! Made of fire retardent polyester with mesh windows and a 2000mm hydrostatic head and including taped seams, this simple tent has the basic characteristics of the elusive ‘modern Camfire Tent’ – 3 walls, canopy to keep the rain off, open to the fire in frint and open to your surroundings too. At 8.8kg it’s not the lightest of course, with a metal frame, but you have to say for the price it’s a welcome addition to the line up! If you like the idea (maybe you’re making a more permanent camp for several days, or you’re travelling by 4×4, or a canoe of course, you can get one from www.argos.co.uk – “the Budget Bushcraft Store”!

photo.jpg

Swagasaurus!

I put 3 layers of sleeping mats inside the swag, plus a sleeping bag, fleece liner and extra blanket… And it bloated out to this MONSTER!! Need to cut back on the comfort a bit I think!! Planning for the next trip in a week’s time…

photo.jpg

Re-Light My Fire: Using a FireSteel to re-start your Camp Fire

On a recent Canoe Camping trip I found myself without any dry tinder or kindling to hand in the cold early morning, and the small fire from the night before having burnt out during the night. I remembered a Ray Mears episode where he used a charred log from an old firepit and using a flint-striker he got a spark going into the blackened wood and created an ember that he blew into flames in no time at all.

So with that piece of TV-derived Bushcraft knowledge in mind I used my Swedish firesteel and tried the same thing. Ray had said that it worked best where there were white ash bits on the charred logs due to the “free radicals” which he said he thought “sounded like revolutionaries” (very droll Ray…;-)) Anyway, whatever they are I tried that and to my great delight with some focussed blwoing sure enough the spark began to glow right away and was soon building up a good deal of glowing red charcoal – shortly after that and after positioning some other twigs and and burnt stick-ends on top the fire suddenly burst into flames! We put the Kelly Kettle right on top and shortly after had hot coffee while the small fire took the chill off the early morning air in the valley.

I did some further ‘Backyard testing’ on this since and yes it’s a great technique especially when you’re staying more than one night in one place, but if you are travelling downstream each day then you can use it as I did to get your breakfast on, or simpluy take a small piece of the prievious campste’s fire with you (allow it to cool of course) and apply this technique at your next stop! Here’s some pictures of this simple technique in action:

fire5.jpg

fire4.jpg

fire3.jpg

fire2.jpg

fire1.jpg

Campfire Tent Hunt – Latest: The Bush Shelter

Update: See our latest test of the Green Outdoor full size Campfire Tent.

Baker Tent Hunt continues… In our hunt for the perfect Modern “Baker Tent” or camp fire tent we’ve looked at many different options from large heavy tents like the Oztent to simple lightweight tarp rigs and replica versions of the original 19th Century format.

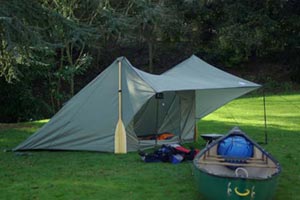
The latest we’ve found is this very interesting design called simply the “Bush Shelter“. As well as the basic properties as a ‘camfire tent’ it has a couple of reasons it’s ideally suited to canoe camping. It’s similar to the MSR Fast & Light tent design we featured earlier in that it’s made of modern lightweight materials with a kind of ‘stretched’ format that creates it’s internal space and it’s essential canopy by clever angle’s of material and guy ropes:

bushsheltercanoetent

Also like the MSR you’ll this one uses trekking poles or ingenioulsy canoe paddles to hold the structure up. Described as “a lightweight, 2 person shelter that can be easily pitched using walking poles or canoe paddles. Front opening to allow maximum connection with the surrounding countryside, with a front canopy over the opening and a sewn in groundsheet for additional protection.” With those advantages for canoists specifically (making use of your paddles, and it’s overall lightwieght and compact design, whilst fulfilling the basic requirements of our Baker Tent Hunt, this is a very promising looking tent and currently a great purchase from www.greenoutdoors.co.uk at only £99 reduced from £149 at time of writing which is fantastic price for an unusual specialist tent like this.

Full details, spec and photo gallery (you need to see this! it all makes sense when you see the photos) here.